How to Transfer Form Data to Custom Objects in HubSpot – Beginners Guide
How to Transfer Form Data to Custom Objects in HubSpot – Beginners Guide

HubSpot, empowers Startups and SMEs to harness their data for targeted marketing, operations, and improved customer engagement.
One of the advanced features of HubSpot is the ability to create custom objects that allow you to bespoke your CRM to your business needs.
But do you know how to transfer form data to custom objects in HubSpot?
This guide will walk you through the process, ensuring you make the most out of your HubSpot platform.
What are the Custom Objects in Hubspot?
It’s important to understand what custom objects are and why they matter.
Custom objects in HubSpot allow you to store and manage data that doesn’t fit neatly into standard CRM objects like contacts, companies, deals, or tickets.
For example, you might create custom objects to track inventory, subscriptions, or events.
This is useful for businesses with different workflows or data requirements that extend beyond standard CRM software.
Why Transfer Form Data to Custom Objects?

Forms are a primary method for capturing data from leads, customers, and other stakeholders.
Whether it’s a contact form, a survey, or a sign-up sheet, the data collected through forms is invaluable.
By transferring this data to custom objects in HubSpot, you can organize and leverage it more effectively, ensuring that it aligns with your business processes.
Here are some scenarios where transferring form data to custom objects can be beneficial:
Tracking Event Registrations
If you’re hosting an event, you can create a custom object to manage event registrations and transfer form data directly to this object.
Managing Subscriptions
For subscription-based businesses, custom objects can help manage and track subscription details, with form data transferred automatically.
Inventory Management
Custom objects can be used to track inventory items, and forms can collect data about stock levels, new inventory items, or product orders.
How to Transfer Form Data to Custom Objects in HubSpot

Set Up Custom Objects in HubSpot
The first step in transferring form data is to ensure that your custom objects are set up correctly in HubSpot.
Here’s how you can do this:
Browse to the Custom Objects Section
Log in to your HubSpot account and go to the Settings menu. Under Data Management, select Custom Objects.
Create a New Custom Object
Click on the Create Custom Object button. You’ll be prompted to define the object’s properties, such as the name, label, and associated properties.
Define Object Properties
Customize the properties of your object based on the type of data you plan to collect. For instance, if you’re creating an event registration object, you might include properties like event name, date, attendee name, and registration status.
Save and Publish
Once you’ve configured your custom object, save and publish it so that it’s available for use in your HubSpot CRM.
Create and Configure Your Form
Next, you’ll need to create a form that will capture the data you want to transfer to your custom objects. Follow these steps:
Create a New Form
From the HubSpot dashboard, navigate to Marketing > Lead Capture > Forms. Click on the Create Form button.
Add Form Fields
Add the necessary fields to your form that correspond to the properties of your custom object.
For example, if your custom object tracks event registrations, ensure your form includes fields like attendee name, email, and event details.
Configure Form Settings
Customize the form settings, including submission notifications, follow-up emails, and redirect URLs.
Save and Publish the Form
Once your form is configured, save and publish it. You can embed the form on your website or use it in a landing page.
Mapping Form Data to Custom Objects Using HubSpot Workflows
The most effective way to transfer form data to custom objects is by using HubSpot workflows.
Workflows automate the process of mapping form submissions to custom objects, saving you time and ensuring accuracy.
How to Transfer Form Data to Custom Objects in HubSpot WorkFlows
Go to Automation > Workflows and click on Create Workflow. Choose the option to create a workflow from scratch.
Set Enrollment Triggers
Define the enrollment triggers based on the form submissions. For example, if you’re transferring event registration data, set the trigger to enroll contacts when they submit the event registration form.
Add Workflow Actions
Use the Create Record action to map form data to the custom object. Select the custom object you created earlier and map the form fields to the corresponding object properties.
Test and Activate the Workflow
Before activating the workflow, test it to ensure that the form data is correctly transferred to the custom object. Once you’re satisfied with the setup, activate the workflow.
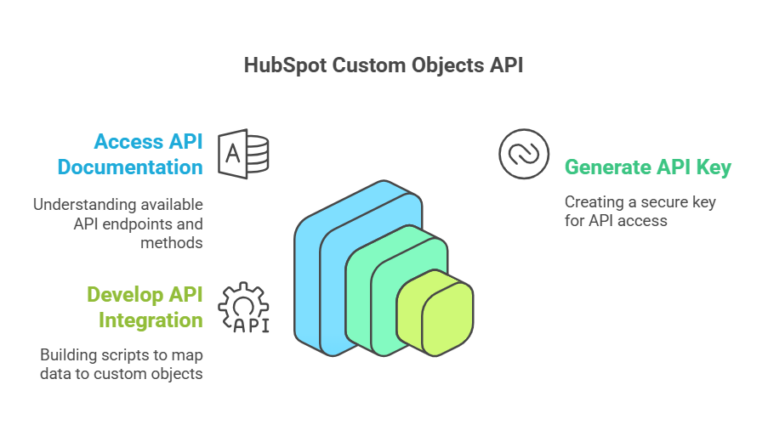
How to Transfer Form data to Custom Objects HubSpot API

For businesses with more complex requirements, using the HubSpot API to transfer form data to custom objects might be necessary.
The API provides greater flexibility and control over the data transfer process.
Here’s a brief overview:
Access HubSpot API Documentation
Visit the HubSpot API documentation to understand the endpoints and methods available for custom objects and form data.
Generate API Key
In your HubSpot account, go to Settings > Integrations > API Key and generate a new API key.
Develop API Integration
Use the API to create custom scripts or applications that map form data to custom objects.
This might involve creating custom endpoints, authentication, and mapping data fields.
How to Transfer Form Data to Custom Objects HubSpot Email

If you’re collecting form data through email submissions, you can still transfer this data to custom objects. Here’s how:
Set Up Email Capture
Use HubSpot’s email capture feature to collect data from email submissions.
Use Workflows
Configure a workflow that enrolls contacts based on email submissions and maps the data to custom objects.
Manual Data Entry
For one-off cases, manually input the data into the custom object through the HubSpot CRM interface.
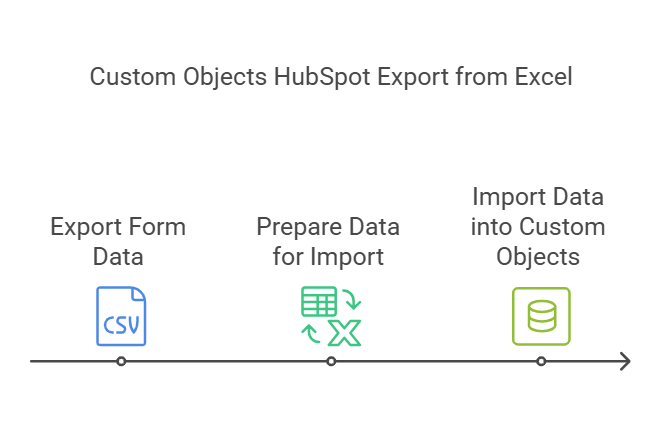
How to Transfer Form Data to Custom Objects HubSpot Export from Excel

For businesses that prefer working with Excel or CSV files, HubSpot allows you to export form data and then import it into custom objects.
Here’s the process:
Export Form Data
Navigate to the form submission data, and use the export feature to download the data as a CSV file.
Prepare Data for Import
Open the CSV file in Excel, and format the data to match the custom object properties in HubSpot.
Import Data into Custom Objects
Use HubSpot’s import feature to upload the CSV file and map the columns to the custom object properties.
How to Transfer Form Data to Custom Objects HubSpot Contacts
Integrating custom objects with HubSpot contacts can enhance your CRM’s capabilities.
Here’s how you can transfer form data related to contacts into custom objects:
Create Associations
In your custom object setup, create an association with the HubSpot contact object.
Use Workflows
Configure workflows that map form data to both contact properties and custom object properties, ensuring that all relevant data is captured.
Automate Contact Management
Use HubSpot’s automation tools to keep contact records updated based on form submissions and associated custom object data.
How to Transfer Form Data to Custom Objects HubSpot ObjectTypeId

The ObjectTypeId is a unique identifier for each custom object in HubSpot.
When transferring form data via API, knowing the ObjectTypeId is crucial.
Here’s how you can use it:
Retrieve ObjectTypeId
Access the custom object’s settings in HubSpot to find the ObjectTypeId.
Use in API Calls
Include the ObjectTypeId in your API calls when creating or updating records in custom objects, ensuring that the correct object is targeted.
Automation and Workflows
Use the ObjectTypeId in workflows and automation settings to map form data accurately to the correct custom object.
Conclusion
From creating custom objects to setting up automated workflows, this guide equips you with the knowledge to transfer form data to custom objects in HubSpot.
Whether you’re a startup or Small business, mastering this process will help you unlock the full potential of HubSpot’s CRM capabilities.
How to Transfer Form Data to Custom Objects Hubspot – FAQs
Can you customize HubSpot forms for free?
Yes, you can customize HubSpot forms for free using HubSpot’s form builder. The free version allows you to add fields, customize the design, and embed forms on your website.
How do I import a form into HubSpot free?
To import a form into HubSpot’s free version, you’ll need to manually recreate the form using HubSpot’s form builder, as direct form imports are not supported.
Relevant Guides
How to Delete An Invoice on Hubspot
How to Integrate Hubspot with Elementor Forms
How to Build a Header in Hubspot
How to Associate Campaign with Webinar in Hubspot


